Menu, virtual screens, two displays
WTware terminal configuration is stored in configuration file. The most simple configuration file consists of one line:
server=192.168.1.1
Such configuration file means, that after boot terminal will automatically connect to
terminal services on 192.168.1.1 server. In configuration file you may specify many
other parameters, all of them you will find in this manual with descriptions.
Menu
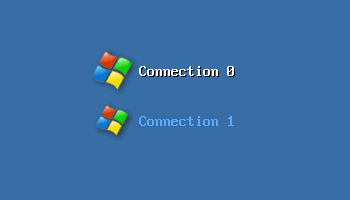
Here's menu with two items:
connection
server=192.168.1.1
connection
server=192.168.1.2
After boot on the screen will be menu:
Let's add descriptions, add new server item and item for turn off:
turnoffmenu=on
connection
displayname=Connection to the first server
server=192.168.1.1
connection
displayname=Connection to the second server
server=192.168.1.2
connection
displayname=Enter server address
server=--new--
After boot on the screen you'll see:

When you press "Enter server address" you'll see such interface:

Simultaneous connections
Menu allows to select one connection from the list. To connect to another server you are to disconnect from selected server — shutdown current connection — and return to menu.
WTware allows to use up to four simutaneous connections. For example:
server=10.1.1.82
next screen
server=10.1.1.83
After boot terminal connects to 10.1.1.82 and 10.1.1.83. Switching between virtual screens
is done by Win-arrows, Win-1, Win-2 or by mouse using pop-up window in right-bottom screen corner:

Complex configuration file:
turnoffmenu=on
connection
displayname=Connection to the first server
server=192.168.1.1
connection
displayname=Connection to the second server
server=192.168.1.2
user=Jack
disk=usb
connection
displayname=Enter server address
server=--new--
next screen
application=chrome
next screen
server=10.1.1.83
next screen
server=--new--
On the first virtual screen — menu with four items. On the second screen — embedded Google Chrome
(requires 1Gb RAM on terminal, doesn't work on Raspberry Pi). On the third virtual screen —
connection to 10.1.1.83 server. On the fourth virual screen — interface for entering terminal
server address.
Second display
WTware allows to connect second display to the computers with two video outputs. For more details about two displays read this manual. You should specify correct video, display and M2_display values. For example, one connection stretched on two displays:
video=i915(F)
display=1920x1080,HDMI
M2_display=1366x768,VGA
server=192.168.1.1
Also you can run different connections on each screen:
video=i915(F)
display=1920x1080, HDMI
M2_display=1366x768, VGA
M2_position=right-top
connection
server=192.168.1.1
M2_next screen
connection
server=192.168.1.2
Example of very complex configuration file for terminal with two displays, four virtual screens on each display:
turnoffmenu=on
video=i915(F)
display=1920x1080, HDMI
M2_display=1366x768, VGA
M2_position=right-top
connection
displayName=Connection to the first server
server=192.168.1.1
connection
displayName=Connection to the second server
server=192.168.1.2
user=Jack
disk=usb
connection
displayName=Enter server address
server=--new--
next screen
connection
application=chrome
next screen
connection
server=10.1.1.83
next screen
connection
server=--new--
M2_next screen
connection
displayName=Connection to the first server on 2 display
server=192.168.1.3
connection
displayName=Connection to the second server on 2 display
server=192.168.1.4
user=Jane
sound=oss
connection
displayName=Enter server address on 2 display
server=--new--
M2_next screen
connection
application=chrome
M2_next screen
connection
server=10.1.1.84
M2_next screen
connection
server=--new--