HTTPS configuration for editing configuration, stored on terminal local disk
Starting from 5.4.26 version stored on terminal local disk terminals' configurations can be edited only by https and it's password protected. For now it concerns only terminal configuration and config.txt for Raspberry, but it's not the end.
There's one problem: https is made for real servers. And these servers have previously known names. Needed for https encryption certificated are bound to server name or IP address. But we don't know neither names nor addresses of your WTware terminals.
It's impossible to release https certificate to arbitrary IP. Browsers do not understand it.
It's impossible to release https certificate to any name. The best thing that browsers agree to acccept is arbitrary part of domain name at the third level.
There are three ways:
- Agree to add security exception for every terminal, where you edit something. Encryption in https works anyway, even when browser send exception, https with such errors is more secure that http with no encryption. You may work this way and do not continue reading.
- Install our root certificate and configure DNS. It's more complicated, but browser will show green lock image, as for all https sites.
- Create your own root certificate, install it on your computer and ditribute to all terminals. And configure DNS. Even more complicated, but you won't have to trust our root certificate.
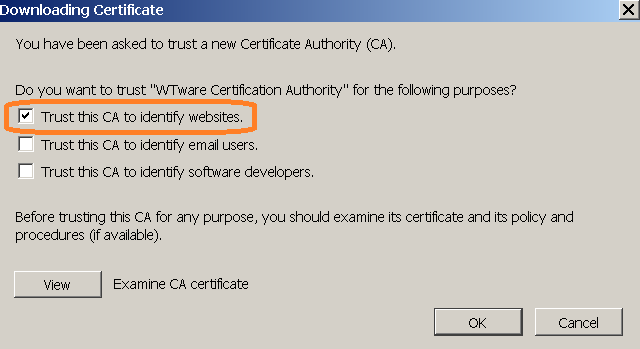
Install our root certificate
Our root certificate is available from any terminal. Open by http (not https) terminal IP in browser and open "About HTTPS" section. When you install certificate in Firefox select this item:
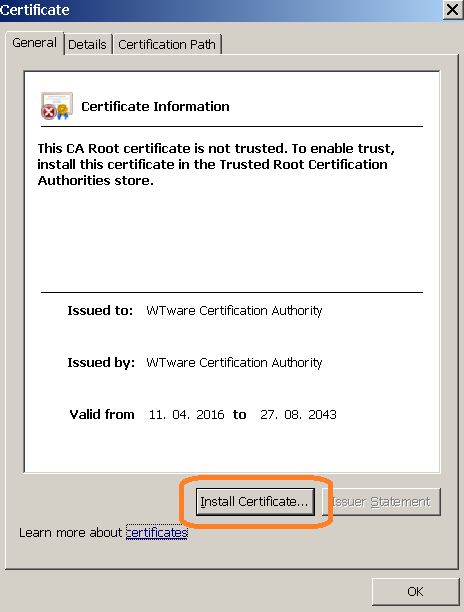
Internet Explorer and Chrome:


Configure DNS
Certificate is released for *.wtware.local. Configure DNS so that terminals' names were in this zone.
Then in browser you will enter names, not terminal IPs. Easy and boring way: in Notepad manually add to
C:\Windows\System32\drivers\etc\hosts file several lines for needed terminals:
192.168.5.25 term1.wtware.local
192.168.5.26 term2.wtware.local
192.168.5.33 buh.wtware.local
More interesting way is to configure DNS. WTware is able to send DNS updates during configuration by DHCP. Manual for configurating DNS updates from DHCP in Windows is available in Google.
Create your own certificate
If you don't want to install our root certificate. Or if you want to use other names, not from *.wtware.local.
- Download archive and extract from it https.inf file.
- In the directory you extracted https.inf to run in command line:
certreq.exe -new https.inf https.req
Should be like that:
- Files https.inf and newly created https.req are not needed anymore, delete them.
- Win-R, certmgr.msc. Export created certificate:

- Select "Yes, export the private key"
- Select "Export all extended properties"
- Specify password: wtware (six small latin letters).
- Save as https.pfx.
- Import saved https.pfx to Trusted Root:

- Copy https.pfx to the root of WTware boot USB flash or SD card.
This certificate is also released for *.wtware.local names. DNS is to be configured anyway. But you can bound certificate to other names by editing https.inf.
Result
When root certificate is successfully installed and DNS terminal name is specified, you should see such result:
