DHCP Server configuration on Windows Server 2012
If you prefer not to use our WTDHCP service, then to configure DHCP server this manual for Windows Server 2012 will be useful to you.
Many thanks to our user Rushmore for this work.
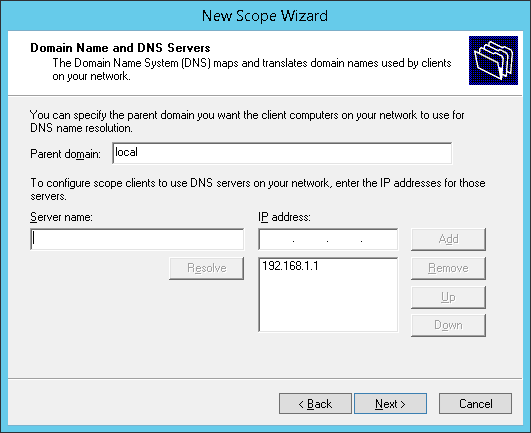
Let's work with simple network 192.168.1.0/24. Router to the outside world is 192.168.1.1, at the same time it's DNS server.
DHCP server is 192.168.1.2. Install on it Windows 2012 R2, add DHCP Server role. Server must have static IP address!
Terminal server is 192.168.1.3, with WTware 5.4.16 istalled, all settings are default. WTware DHCP turned off, TFTP turned on.
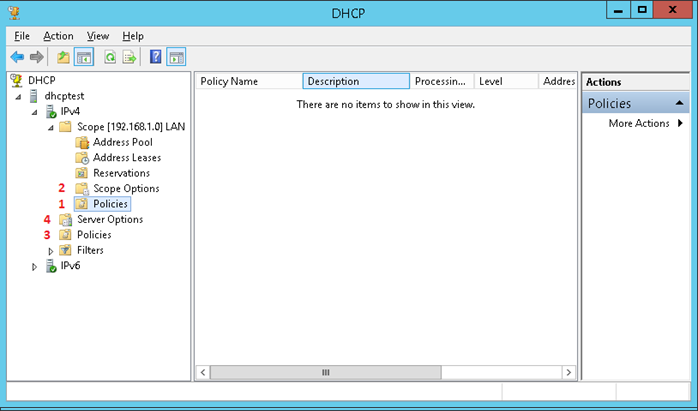
Login to DHCP server as administrator, run DHCP control console.

Add new address scope.

Let's call it LAN.


Exclude first 15 addresses from DHCP distribution (or you can add all static addresses to reservation later).

Do not change default lease duration.

Configure options.
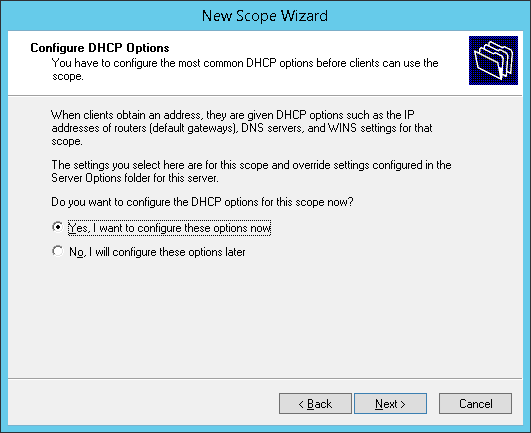
Router (default gateway).

DNS server address and domain name (if needed).
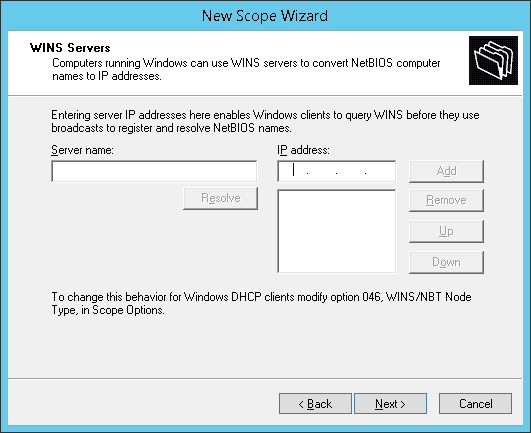
WINS — specify, if you use this anachronism.
Activate scope.
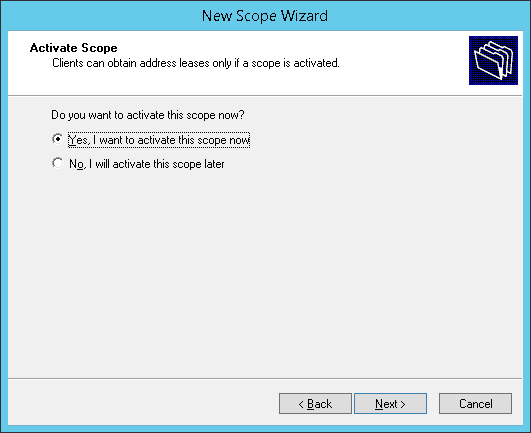
Press Finish.

Address scope is ready.

At this stage workstations will receive addresses and basic settings from DHCP server. Now let's start configuring network boot.
Two types of clients will boot by network:
- x86 — BIOS
- x86 — UEFI 64-bit
To determine needed boot files we'll use DHCP policies. DHCP policy is the rules, that help to asign IP addreses and/or DHCP options for the clients, that match policy conditions.
DHCP server receives request from client and assigns addresses and options in this order:
- Scope Policies in order of priority.
- Scope Options
- Server Policies in order of priority.
- Server Options
Each policy has it's own priority. Priorities are numbered starting from 1. Policies with less numbers have higher priority. If the same options are specified in two policies, then client will receive the option from the policy with higher priority. Policy priority can be changed in GUI: in policy context menu choose "Up" or "Down".
Policies do not apply to specified in Reservations MAC-addresses!
Policies may be applied to:
- Vendor Class
- User Class
- MAC-address
- Client PXE GUID
- Client domain name (12 option)
- DHCP Relay, that responds to client.
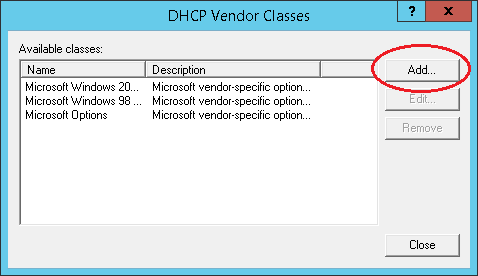
We are interested in Vendor Class now. To add policy you need to create needed Vendor Class.

Firstly let's define five classes:
- PXE Client x86
- PXE Client UEFI x64
- PXE Client UEFI BC
- WTware
Press "Add…" to add new Vendor Class.
Specify class name: PXE Client x86
Specify class ID: PXEClient:Arch:00000
Data should be either Binary (hexadecimal values), or ASCII (just enter text). Make sure you entered correctly or nothing will work.
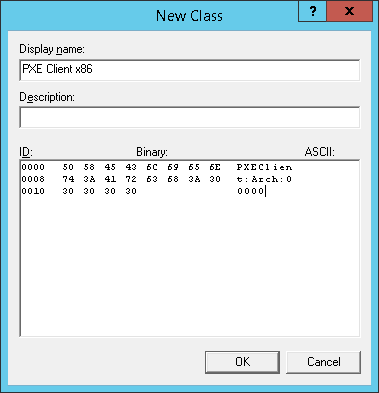
Press OK, you'll see such result:

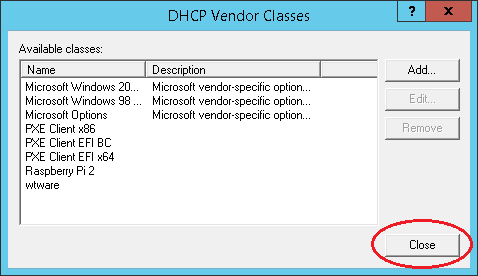
In the same way add these classes:
- Class name: PXE Client EFI BC
- Class ID: PXEClient:Arch:00007

Class name: PXE Client EFI x64
Class ID: PXEClient:Arch:00009

Class name: wtware
Class ID: wtware

Classes are ready. Press "Close" and proceed to adding policies, that our classes will use.

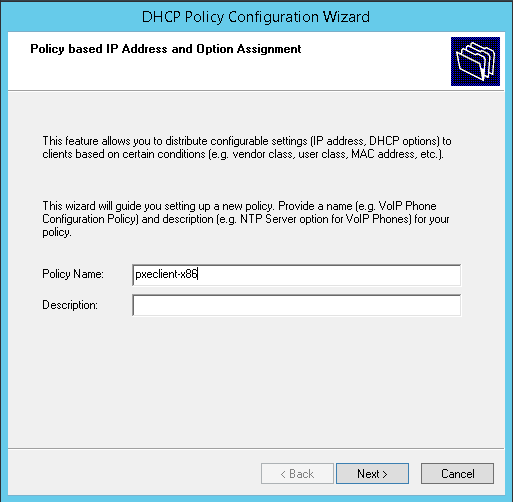
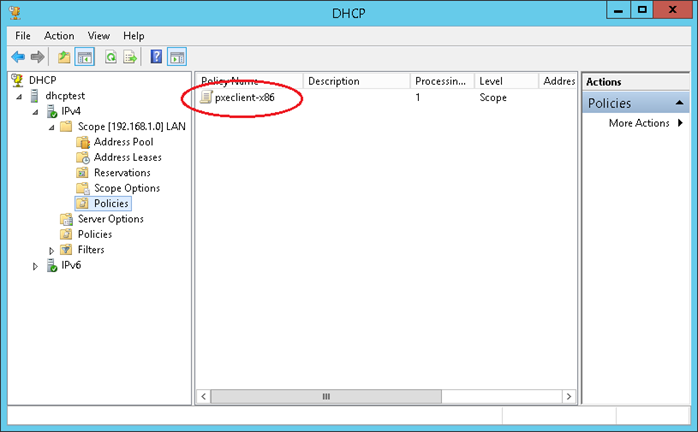
Policy name: pxeclient-x86
Policy will determine the way of clients' boot in BIOS.
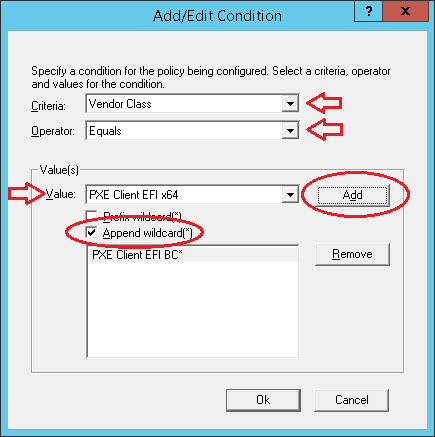
Add policy condition.

Specify as shown on this image:
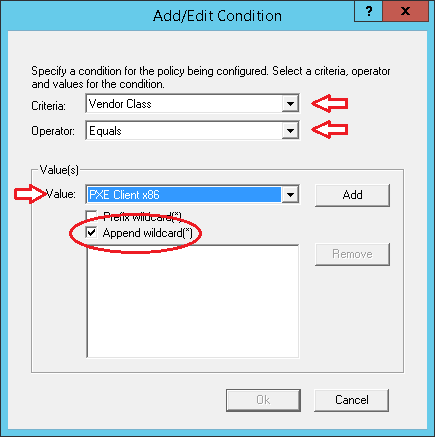
Pay attention to "Append wildcard(*)" checkbox. It means that any Vendor Class, that starts from "PXEClient:Arch:00000", corresponds to policy condition.
Press "Add".
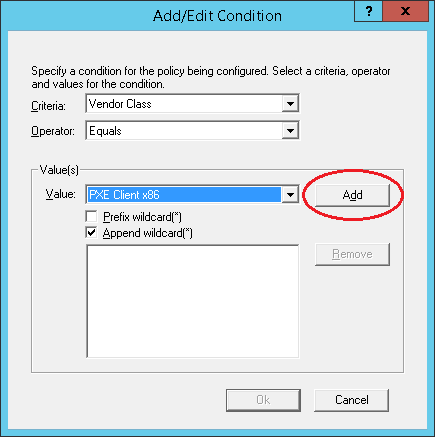
Press OK.

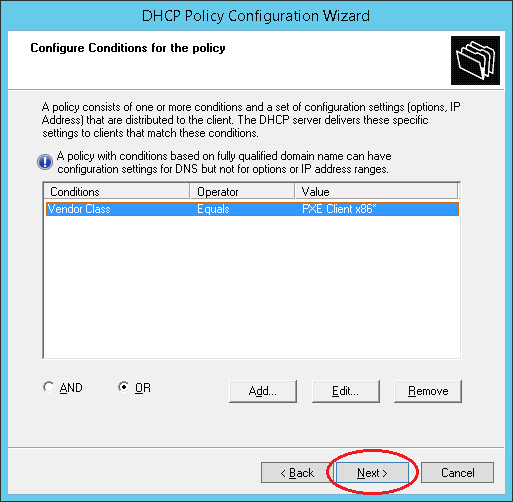
Condition is ready, press Next.
We don't need IP reservations, so press No and Next.

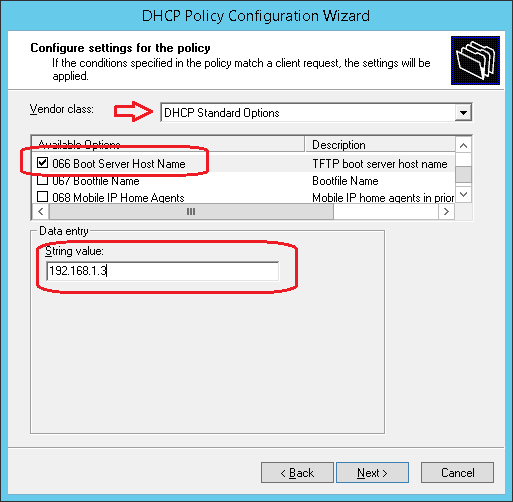
Configure 66 option.
192.168.1.3 — is address of our TFTP server, where WTware boot files are stored.
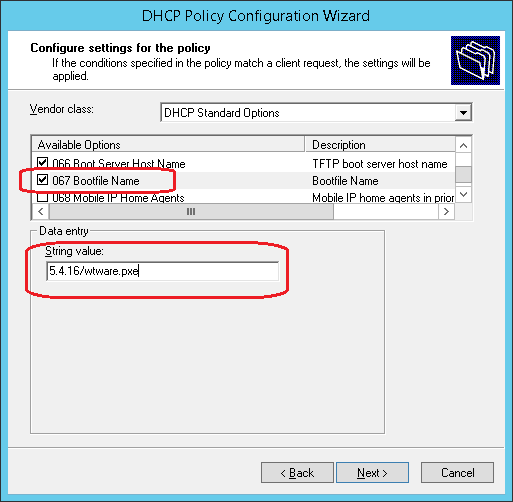
Configure 67 option.
Bootfile name: 5.4.16/wtware.pxe
Press Next, policy configuration is finished.

Policy is added.
Next policy is for UEFI x64 clients boot. Policy name: pxeclient-uefi64

Add first condition.

Second policy condition.
Policy condition is satisfied when Vendor Class is one these two values:

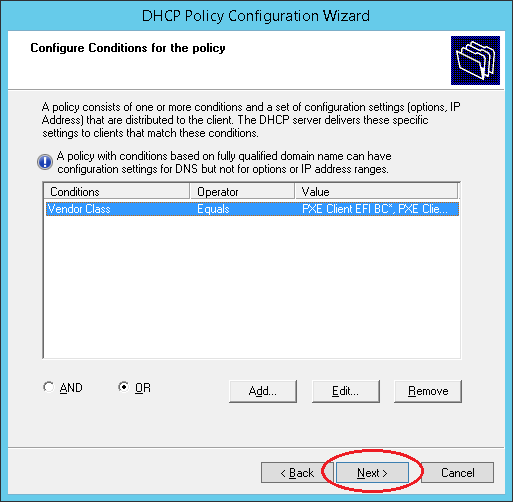
Skip IP addresses configuration as for previous policy.
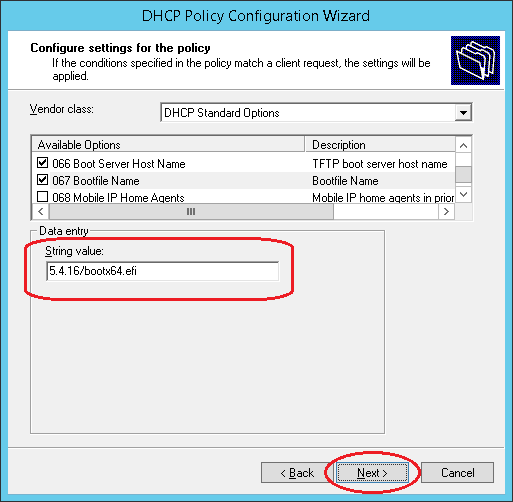
Then configure options as for previous policy:
- 66 option: 192.168.1.3
- 67 option: 5.4.16/bootx64.efi
Policy configuration is finished.

Second policy is added.

Now the last policy — for WTware. It reads 66 and 67 options to determine path for packets loading. Create it the same as previous policy:
Policy name: wtware
In policy condition specify Vendor Class "wtware"
- 66 option = 192.168.1.3
- 67 option = 5.4.16/wtware.pxe
Also special WTware 18 and 179 optiona may be added here if needed.

Configuration is finished. All client types should boot successfully.

Surely, it's the most simple example. In real networks everything is more complicated.
It's important: for policies are not compatible to reservations, if you need to specify hostname (12 option) or to reserve static address for some client, add new policy with "MAC-address" condition and configure needed parameters for this MAC-address in policy options.