DHCP configuration
DHCP (Dynamic Host Configuation Protocol) - is a network protocol, that allows computers to automatically obtain IP-address and other parameters, needed for work in TCP/IP network. Compter requests for them special server, called DHCP server.
For network boot DHCP server must tell terminal two additional options:
- Where to boot from. Terminal will download operation system's files from the server with this IP-address.
- What to boot. Name of the file, that must be downloaded first.
Good news: WTware DHCP will do everything for you. Network boot should work automagically, if you installed WTware DHCP. For more details about WTware DHCP configuration read this manual.
Bad news: there must be only one DHCP server in network. Do not even try to use two DHCP servers in one network. If you already have DHCP server (sometimes it's in router or Wi-Fi hotspot) and you are not ready to replace it with WTware DHCP, you must configure your DHCP server.
1. Where to boot from
Option named Next Server or 066 DHCP Option. IP-address of the server, where TFTP service works. You must specify IP-address of the computer with WTware installed. Only digital IP-address, not name! For Microsoft DHCP it can be specified in such way:

For Linux ISC DHCP two lines:
next-server 192.168.0.1;
option tftp-server-name "192.168.0.1";
Mikrotik:

2. What to boot
Two possible values. New computers work under UEFI. Under UEFI works 64-bit WTware with newer linux kernel and newer drivers. In UEFI BIOS settings (usually in Boot section) turn off Legacy/Compatibility/CSM, so that computer wouldn't simulate old Legacy BIOS. Under UEFI this boot file must be downloaded:
6.0.72/bootx64.efi
Instead of 6.0.72 specify your WTware version.
Old computers, released before UEFI spreading, work with Legacy BIOS. With Legacy BIOS works 32-bit WTware with older linux kernel, it contains more drivers for old hardware and no drivers for new hardware. On old computers must be downloaded this boot file:
6.0.72/wtware.pxe
Determine needed value and specify it in DHCP option. Option named Bootfile Name or 067 DHCP Option. For Microsoft DHCP specify:

For Lunx ISC DHCP two lines:
filename "6.0.72/wtware.pxe";
option bootfile-name "6.0.72/wtware.pxe";
Mikrotik:

These two options are enough to boot computer by network.
If in one network there are both UEFI terminals and Legacy BIOS terminals, or if different WTware versions must be downloaded to different terminals, you have to make static settings for needed MAC addresses on DHCP server.
UEFI and BIOS autodetect
WTware DHCP automagically detects UEFI and BIOS and chooses correct boot file.
Microsoft DHCP should be configured: manual about Microsoft DHCP configuration.
Linux ISC DHCP:
filename "6.0.72/wtware.pxe";
option bootfile-name "6.0.72/wtware.pxe";
option client-system-arch code 93 = unsigned integer 16;
class "pxeclients" {
   match if substring(option vendor-class-identifier, 0, 9) = "PXEClient";
   if option client-system-arch = 00:07 or option client-system-arch = 00:09 {
      filename = "6.0.72/bootx64.efi";
      option bootfile-name "6.0.72/bootx64.efi";
   }
}
Mikrotik: manual on forum.
Not too difficult? Then we have HTTP boot!
Password to enter Setup and HTTPS
During terminal load you can press DEL:
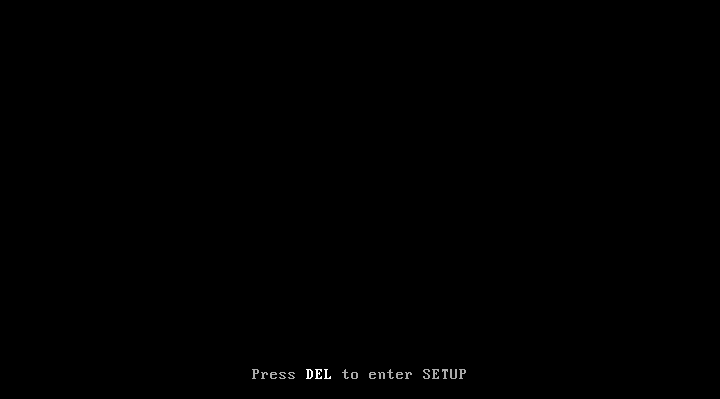
to enter SETUP menu:

Using Setup menu you can install WTware on a hard disk (all disk data will be lost) or reconfigure terminal parmeters. If you want users to have no access to this menu set password. Unfortunately, this password can't be just set in configuration file, for during terminal load terminal haven't jet downloaded its configurtion file. This password should be specified in 018 DHCP (Extensions Path) parameter. We don't know any system/device/progam except WTware, tha uses this parameter value. You can easily specify this parameter: all other computers in the network will ignore it. This parameter value is distributed to all network computers, so password shouldn't be specified directly in dhcp parameter. Instead of password set parameter value to password hash-function, that is calculated by WTware setup password utility in configurator:
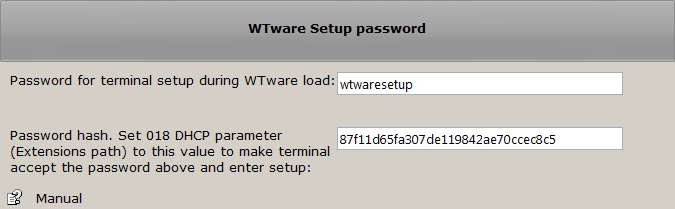
For example if setup menu password is wtwaresetup specify hash in DHCP parameter.
In Microsoft set:
In WTDHCP service (see WTware configurator) set:

In Unix DHCP set:
option extensions-path "87f11d65fa307de119842ae70ccec8c5";Dual DHCP DNS Server:
Extension_Path=87f11d65fa307de119842ae70ccec8c5
Hostname
012, hostname. To specify terminal hostname in Microsoft DHCP set:
In WTDHCP service (see WTware configurator) set:

In Unix DHCP set:
option host-name "term21";
Dynamic configuration file from HTTP server
WTware is able to download configuration file from HTTP server. In this case it adds some terminal information to request. For example you can write PHP script and generate terminal configuration on the fly, connecting to database for settings. It turnes on by DHCP 179 option. In DHCP for Unix at config start specify this option:
option wtware-dynamic-http-config code 179 = text;
Then in common section or in terminal section use it:
option wtware-dynamic-http-config "http://10.1.1.28/wtware/dynamic-config.php";
During boot terminal requests specified address, adding to line:
dynamic-config.php?arch=x86&mac=00.15.5D.00.04.04&ip=192.168.84.101&ver=5.2.9&host=t0000-001
Thus server script through GET parameters will determine architecture, MAC, ip (important if terminal is outside NAT), WTware version and terminal hostname.
Received from HTTP server config is added after ordinary config. It may cause problems when screens and/or connections are specified in both configs. It's better to place screens and connections into one of these configuration files.
You may use it without new DHCP parameter configuration. Instead of 179 DHCP option
you may specify the same value in dynamic: parameter in the file Everyone/source.wtc.
DHCP relay
WTware DHCP may work through built-in router DHCP Relay. Before configuration firstly boot terminal. If router DHCP Relay is configured correctly, terminal sends request to WTware DHCP service. DHCP receives request and adds terminal to WTware configurator list of terminals.
After that run configurator. Select terminal from terminals list (1). Select DHCP tab (2).
Press "Change IP" button (3) and specify terminal IP address you need. Configurator then reports,
that specified IP address doesn't correspond to any interface on this server.
As it should be for terminals behind routers, that connect DHCP through DHCP Relay.

Then press "New" button (4) and add 001 parameter, terminal subnet mask (5, 6).

Select from DHCP parameters list 003 parameter, Router (7). Untick autodetermine checkbox for router
and specify correct router address for terminal (8). Router must be specified.

Press "Save" (9) and close parameters window.